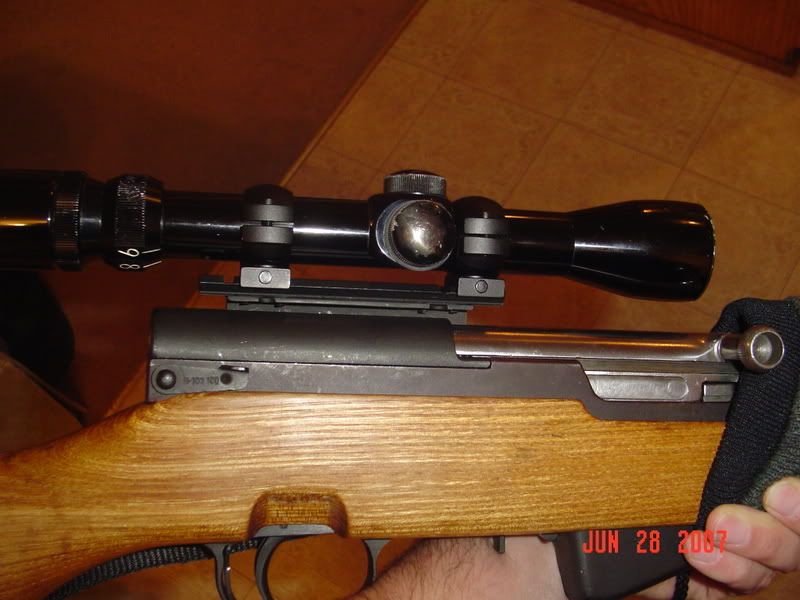
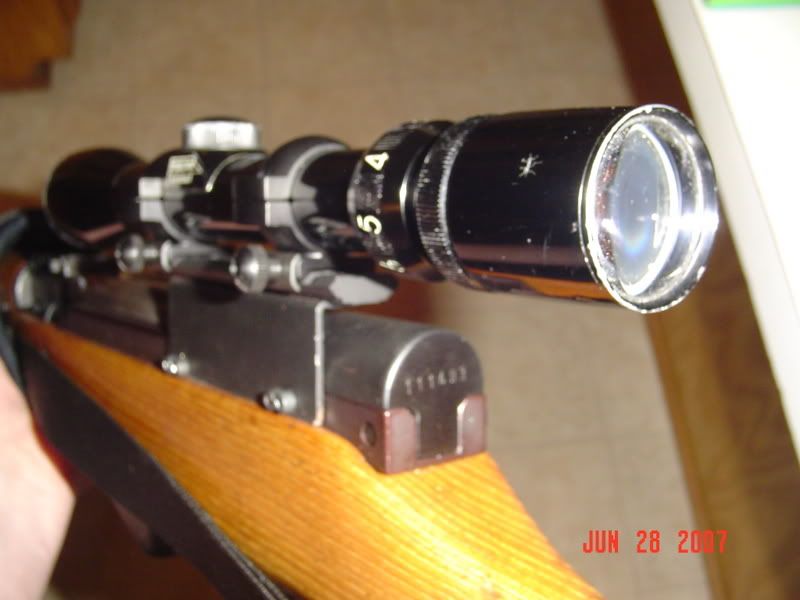
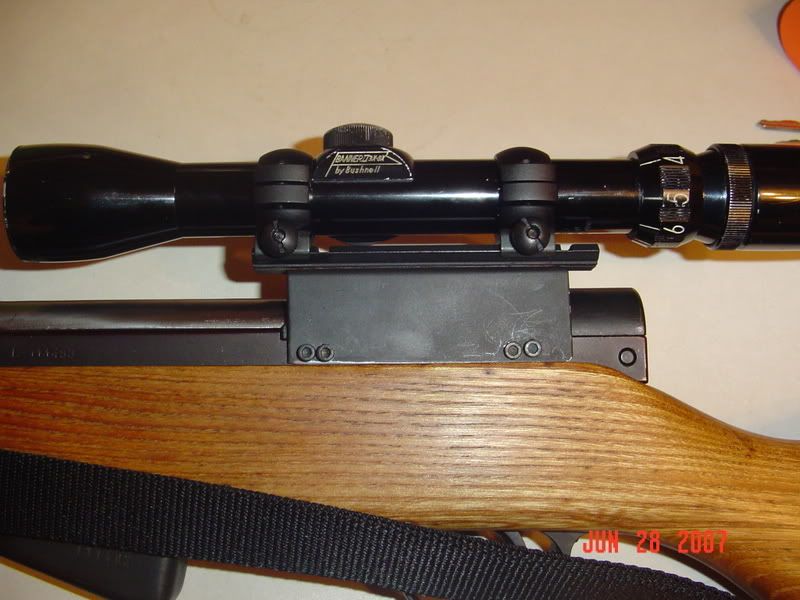
I made this from a piece of galvanized angle steel that I found. It measures 3-1/4x1-1/4 inches. I also used a Leupold Rifleman base for the Marlin 336, part #55910.
The biggest issue with attaching the mount to the receiver was making it low enough to be usable, but still allow removal of the bolt, bolt carrier, etc. I drilled and tapped 4 screws through the angle steel and the receiver while holding them clamped together. Another poster suggested this to allow better return to zero if removed. I will say that it makes it hard to replace the screws. If the holes in the angle steel were slightly oversized it would keep one screw from leveraging against the others as you tighten them in place.
I then tapped some holes into the top of the angle and mocked up the fit of the Marlin scope base. Once I was satisfied that the base would line up, I ground and filed off the excess angle steel on the top. I used hardware store 6-32 cap head allen screws to assemble it all together. This size screw fits into the predrilled 8-40 holes made for Leupold. I wanted to use one type of screw all around and 6-32 was what you can buy off the shelf. It was suggested to use gunsmithing screws (8-40 or so) and I would use those again next time because of the finer threads probably holding better in the soft steel. There is also a bead of JB Weld under the Leupold/Marlin base to bed the two odd pieces of metal together.
The assembled scope mount was then lightly ground/sanded to scuff and remove most zinc galvanizing. I then etched it all with white vinegar and primed and sprayed with flat black paint.
All told I am looking at:
Leupold Rifleman base $6
Tasco rings- junk bin
(6) 6-32 screws .90
(2) 6-32 taps $4
9/64 drillbit $3
Lessons learned were:
Only turn the tap 1/4 turn at a time when cutting threads. I could have saved $2 and a lot of frustration without breaking a tap
Buy a vise
Before you get frustrated needing 3 hands to hold something at the drill press, make a jig with wood to hold it or ask someone for help


A few weeks ago I went to the range to test and was disappointed to find that the offset of the scope would not allow scope's POA to intersect the bore's POI. I had not anticipated that.
After some soulsearching about the easiest way to adjust the scope mount and debating the use of my meager Geometry skills, I got my trusty deadblow hammer and love-tapped it two times.
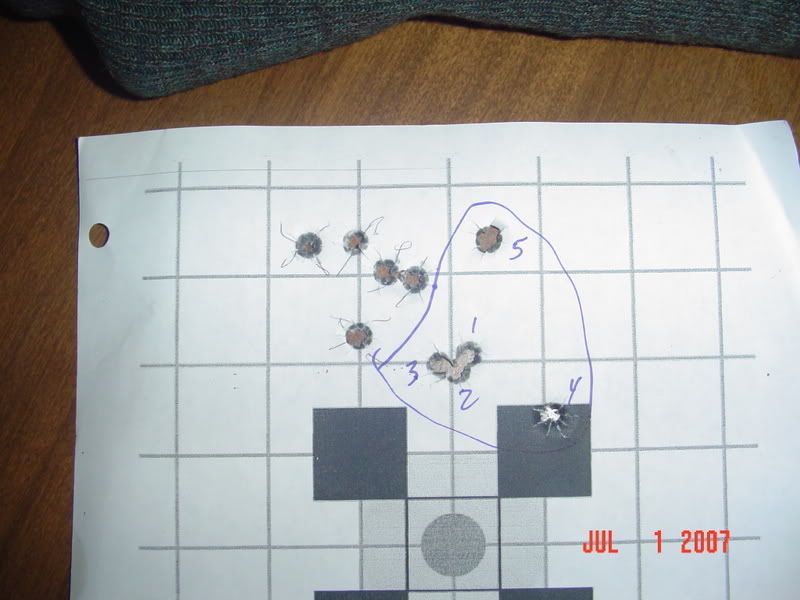
I went to the range Saturday to retest my project. The best of my handloads has been 28.0 grains of H4895 with the 123 grain Hornady VMAX. At 50 yards this is what I got. After the first string, I retightened the mount screws and dialed some more right windage. The second string had 3 shots touching and I think that I got excited and choked the last two.
I am very pleased with my project and I hope that it helps someone else out. I just couldn't see spending $40 for the Choate drill and tap mount. I AM CHEAP.