Author Topic: Firecracker Mortar...  (Read 995 times)

0 Members and 1 Guest are viewing this topic.

Offline MikeR C

  • Trade Count: (0)
  • Avid Poster
  • **
  • Posts: 178
  • Gender: Male
Firecracker Mortar...
« on: August 07, 2007, 04:28:37 PM »
I needed a cannon to take to my sisters for the fourth of July. I decided on the following design requirements:
It had to shoot firecrackers
It had to be sturdy and not too small.
It had to be safe to use around the mess of kids that always show up, and they had to be able to help without too much danger.
It had to be built in one day, “cause it was the night of the 2nd.

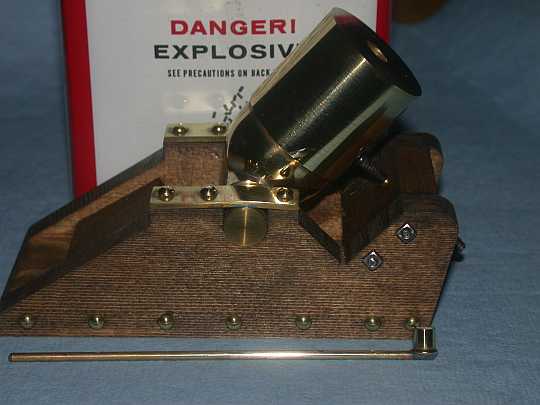
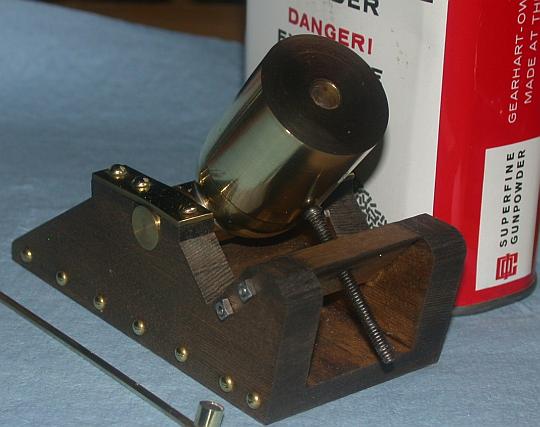
The following is what I came up with. I started with a piece of 1¼ 360 brass drop about 3” long, faced it , bored it, turned off the rough surface, turned it around, sawed it to length with a hack saw, and cut the breech end sorta half round freehand by using a bit in a straight Armstrong holder like a gouge on a wood lathe. That actually worked quite well as long as the rest was very close to the work. Stuck it in the mill and cut a half round groove for the trunnion. Turned the trunnion to fit the groove and soft-soldered it together. No touch hole was drilled.

A block of wood was clamped in the milling vice and the top was cut so the side profile was what I wanted then the waste was milled out from between the cheeks, the bed and cheeks are all one piece. I added a couple of cross pieces and a handful of brass rivets drilled and glued in.

I cut a .22 empty to ¼ inch over all and soldered a brass rod to it for a powder measure. I transferred powder from the can, the can of 4F was left locked in the truck, to a plastic film can about ½ to ¾ full so if there were any accidents there wouldn't be a big explosion.

To load it the “help” would get a scoop of powder from the film can, which I pretty much kept an eye on, closed the lid (that was a rule), then poured it down the bore. Then the fuse of the firecracker was folded up the side of the firecracker and pushed down on top of the powder. The fuse was lit and the cannon would go off and the firecracker would pop about 15 to 20 feet in the air.

No touch hole meant no fuse parts spitting at the kids, they all come out the “business” end, and firing it at 45 degrees meant it would be hard to hit anybody. The kids quickly found out that overloading it gave LESS noise and height so settled on loading it with one scoop. It was originally drilled for 1” firecrackers as that’s what I had laying around, I may drill it a bit deeper so 1 ½ firecrackers will work a better.

The bottom edge of the sled is about 4.5" long. The bore was drilled with a 17/64 bit, .7" deep, could be deeper for 1 1/2 in crackers. You want 1/8" or so of fuse sticking out of the muzzle. This makes the walls a bit over 2 bore diameters and much thicker at the breech, safe enough I expect.

Side view with powder can:

The business end:

Finally "smoke and fire":
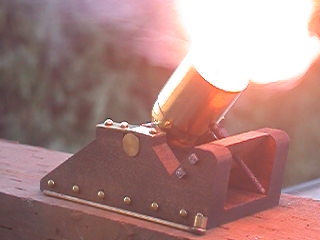


It is not very loud, the firecracker makes much more noise, but it is very fun. I hope this was at least worth the time it took for you to download it anyway.

Thanks,
MikeR C

Offline lance

  • Trade Count: (0)
  • Senior Member
  • *****
  • Posts: 1249
  • Gender: Male
Re: Firecracker Mortar...
« Reply #1 on: August 07, 2007, 04:36:58 PM »
your darn right it was worth the time to read and look. that's a great job!!!! i really like it. if you can do that in one day, what would you make if you had two days? i hope you keep making mortars and cannons and posting pics of them. good to see ya back............
PALADIN had a gun.....I have guns, mortars, and cannons!

Offline Tropico

  • GBO Supporter
  • Trade Count: (0)
  • A Real Regular
  • *****
  • Posts: 634
  • Gender: Male
    • Tropico Beach
Re: Firecracker Mortar...
« Reply #2 on: August 07, 2007, 04:47:03 PM »
Its beautiful and i want one. That is awesome and would look tough next to my Desk-top Dictator.  Very nice indeed! The nuts and bolts along with the rest of the carriage is great !

Offline m223

  • Trade Count: (0)
  • Avid Poster
  • **
  • Posts: 201
  • Gender: Male
Re: Firecracker Mortar...
« Reply #3 on: August 07, 2007, 05:11:56 PM »
Wonderfully done, Mike, well worth the look, keep em coming. I was in a hurry for a fire cracker mortar also, so I made it on my 40 minute lunch break. It is pretty basic and not nearly as nice as yours, but it sure is fun, The report is a touch louder than the fire crackers. My little nephew really liked it. He would not believe me that less powder would work better, until he saw for himself.  Tracy             

Offline MikeR C

  • Trade Count: (0)
  • Avid Poster
  • **
  • Posts: 178
  • Gender: Male
Re: Firecracker Mortar...
« Reply #4 on: August 07, 2007, 05:36:32 PM »
Well a lot of the credit should go to Double D for the post he put in the making furniture thread. When I saw the line drawing I instantly decided I had to have one. The nuts were let over from another carriage I am almost done with and the rivets were bought for a 1/4 scale mine cart I started, but have never finished, so it was a matter of looking through the "spares" box for stuff to put on the carriage. I should have shown it loaded, about half of the firecracker sticks out of the bore when it is loaded. I think that you could stop a fired cracker with your hand without getting hurt which is perfect around the kids.  I really have a soft spot for small cannons!

Thank you,
MikeR C

Offline m223

  • Trade Count: (0)
  • Avid Poster
  • **
  • Posts: 201
  • Gender: Male
Re: Firecracker Mortar...
« Reply #5 on: August 07, 2007, 06:25:17 PM »
Well I thought that carriage looked familiar. :-)  I have been following that thread pretty close. I pretty much ripped off Intodeeps design. Like I said yours looks great. I don't do much wood work, and don't have the tools for it so I am hoping my sled works out alright. I'm working on the elevation screw now.

Offline Cat Whisperer

  • Trade Count: (2)
  • Senior Member
  • *****
  • Posts: 7493
  • Gender: Male
  • Pulaski Coehorn Works
Re: Firecracker Mortar...
« Reply #6 on: August 08, 2007, 12:22:57 AM »
Nothing but CLASS ACT!

I've GOTTA HAVE one.
Tim K                 www.GBOCANNONS.COM
Cat Whisperer
Chief of Smoke, Pulaski Coehorn Works & Winery
U.S.Army Retired
N 37.05224  W 80.78133 (front door +/- 15 feet)

Offline Double D

  • Trade Count: (3)
  • Senior Member
  • *****
  • Posts: 12609
  • SAMCC cannon by Brooks-USA
    • South African Miniature Cannon Club
Re: Firecracker Mortar...
« Reply #7 on: August 08, 2007, 05:24:49 AM »
I am impressed, this is way clever!!

Offline intoodeep

  • GBO Supporter
  • Trade Count: (5)
  • A Real Regular
  • *****
  • Posts: 776
Re: Firecracker Mortar...
« Reply #8 on: August 08, 2007, 05:35:30 AM »
It's a neat little mortar! I like it! Nice work MikeR C.
If you make it idiot proof, then, someone will make a better idiot.


Offline MikeR C

  • Trade Count: (0)
  • Avid Poster
  • **
  • Posts: 178
  • Gender: Male
Re: Firecracker Mortar...
« Reply #9 on: August 08, 2007, 05:54:53 AM »
m223,
Well, I sorta cheated on my carriage. I cut the whole thing in a bench mill, I'm much less afraid of a 1/2" end mill than a 10" table saw blade when I'm working with small pieces. I think I read where you started with a piece of 6" stock so you would need a biiig mill to cut out your carriage!

Thx
MikeR C

Offline m223

  • Trade Count: (0)
  • Avid Poster
  • **
  • Posts: 201
  • Gender: Male
Re: Firecracker Mortar...
« Reply #10 on: August 08, 2007, 09:23:56 AM »
Hey what ever gets the job done, What I did was cut me two pieces of wood, 10" wide by 18" long by 1-1/8 " thick. Then I screwed the two pieces together and sketched  my basic design out on it. I drilled the hole for the trunnions and cut the shape out with a big industrial metal band saw. I don't recommend this method, but it worked. Like a dummy on my first attempt I did everything the same way except I tried cutting the screwed together pieces with a big table saw. Everything was looking great until I turned my work over. That's when I discovered the arc of the saw blade does not cut the wood equally on both sides of the wood, Duh. In retrospect I should of just cut one side traced it on to the other piece and cut it. I guess if you don't try you don't learn Tracy