Author Topic: Detail Disassembly/assembly of H&R Topper/NEF Pardner SB1 single shot?? ROUND 2  (Read 1055 times)

0 Members and 1 Guest are viewing this topic.

Offline Imaposer

  • Trade Count: (0)
  • Member
  • *
  • Posts: 7


Well crap!  I posted the following just before the server went tits up and it appears my thread got lost.   :(


Maybe it'll come back, but since I planned to start this project this weekend I thought I'd just repost in hopes of getting some help before I dive in feet first.  So, here's what I posted a couple of days ago...


Hi guys,


I recently picked up a used NEF SB1 break action singe shot for a fun little project.  I originally got the idea from a thread here on ARFCOM.


http://www.ar15.com/forums/t_6_1/378160_Is_there_any_tactical_SHTF_value_to_a_single_shot_12ga.html&page=1


It has no real purpose other than I just wanted one, and that I wanted to use a cheap little project gun to tinker around with and use to experiment for some future project ideas.  The idea was for a short barreled version SS just to have as a simple little "SHTF" gun.  Like I said, no real purpose. ;)   I had planned to buy a standard one and cut the barrel and install a new bead myself (another thing to practice doing) but this one was already cut down and was the cheapest one I'd found so far, so what the heck.


But anyway, I picked this one up, already cut down to 18 5/8" at a pawn shop for $80 OTD.
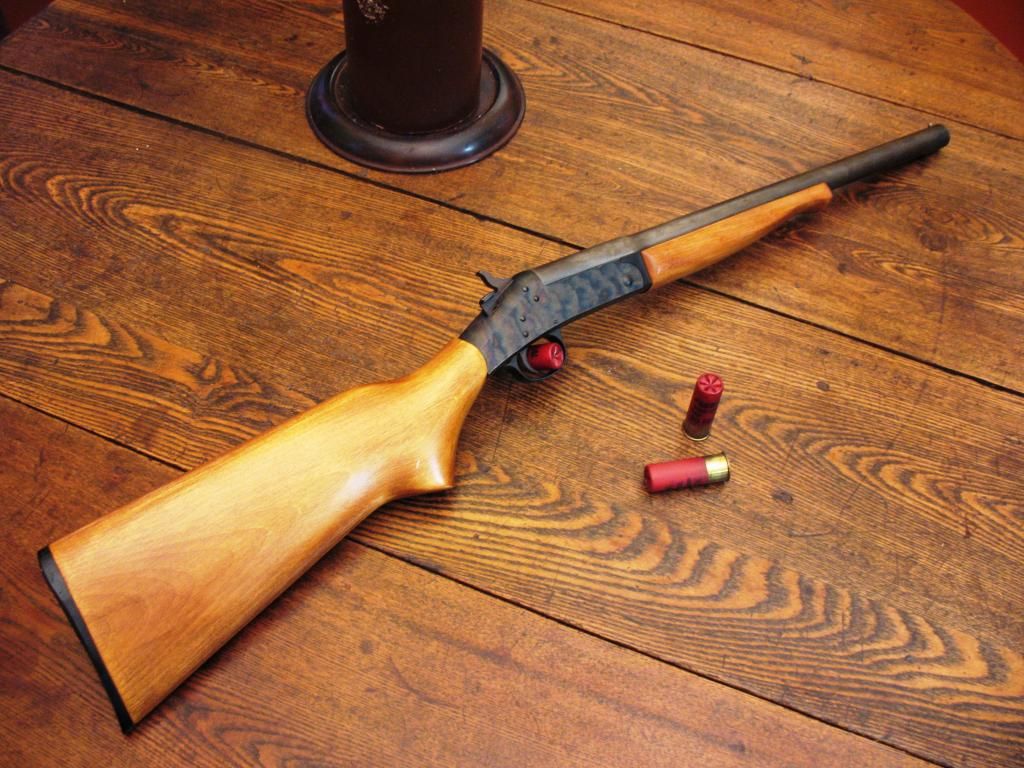


One of the things I wanted it for was practicing my technique of doing a home Parkerizing job on it.  This gun was perfect for my needs because, it was cheap enough, it's in pretty good shape, but needed the barrel refinished.  It seems that at some point it had some rust that the PO decided to scrub off.  So, it's been sanded or steel wooled down and all the original finish is gone from the barrel.  The good news is that there isn't really any pitting on the outside, just some discoloration.  And the blasting and park will take care of the outside, and the bore is bright and spotless.
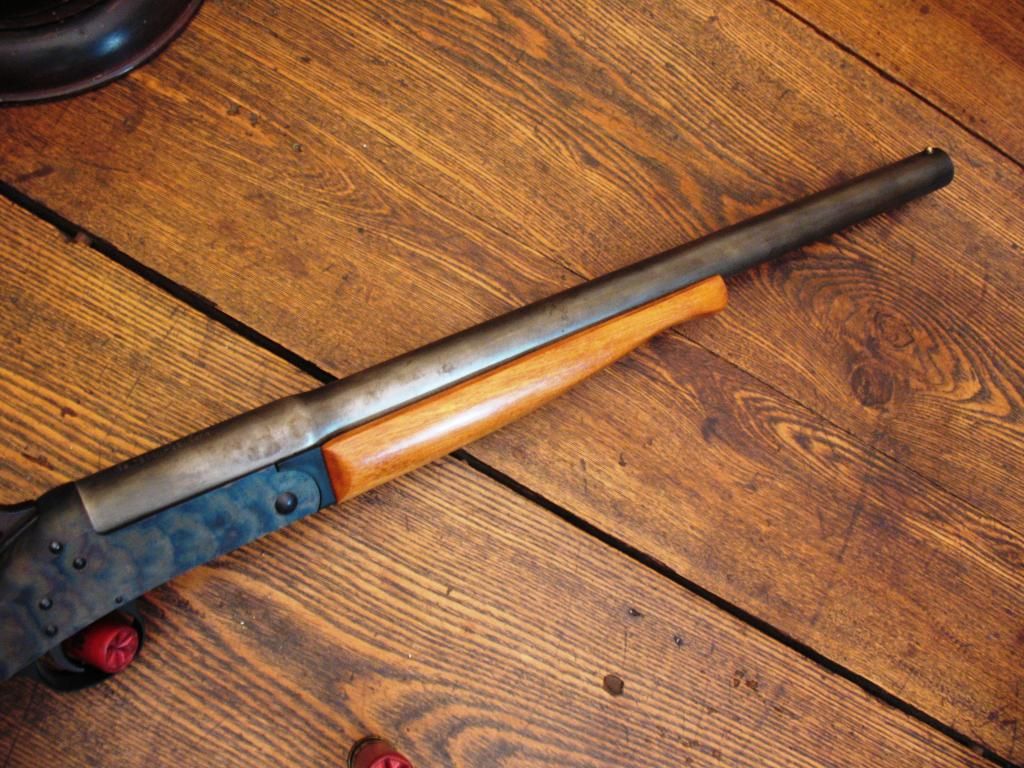


The receiver is color case hardened and is in good shape so I was considering just leaving it alone and just doing the barrel.  But the more I think about it I think I would prefer to have the whole thing Parked to match.


Now, I'm no stranger to guns, or working on guns of all types.  I'm not a pro, but not a "Bubba" either.  I've detail stripped most every gun I own at some point or another, tuned the actions of many, including many S&W revolvers, Ruger revolvers, shotguns, rifles of various types, auto pistols of various type, etc...  Just throwing that out there so I don't get a bunch of recommendations to "take it to a smith..."   I am just a hobbyist, but a conservative one, and not a dumbass...  :)   So, don't worry, ok?


Anyway, before I start punching pins and launching springs, and because this action type is a little different than what I have experience with I thought I'd ask for any pointers on disassembling/assembling the action.  Any specific order to remove or reinstall the pins?  Any pitfalls, or difficult things to get back in correctly?  It may all become readily apparent once I start, but you just never know these things until you're neck deep...  :o And I'd just as soon avoid the frustration if someone has warned me about what to look out for... like that spring that WILL launch itself into outer space... or the "if you don't get this oriented JUST RIGHT it won't work when you're done" type thing...  I'm sure you've all been there and done that, so you know what I mean. :D


I looked around on youtube and found one video, but he has the whole segment where he assembles the action in super fast motion so you really can't tell what he's doing.  Someone commented about that and he said something about "liability".  But other than that, Google hasn't turned up much other than the factory exploded parts diagram, and you know how those are to use as an assembly guide.  :-\


So anyway, any advice, warnings, and/or pointers would be awesome!


Thanks...


Oh, and one other thing I forgot to ask originally.  In parking the barrel, which I plan to do this coming weekend if all goes well, I've noticed the ejector mechanism is integral with the barrel underlug.  I see a couple of roll pins, but I'm not sure how the rest of the mechanism is constructed, or how it works.  It would appear that it would be under a good bit of spring pressure when I observe the force with which it ejects cases, so if it is disassembled, is it difficult to reassemble?  Any tips, or things about this part I should know?

Offline quickdtoo

  • Global Moderator
  • Trade Count: (149)
  • Senior Member
  • *****
  • Posts: 43301
  • Gender: Male
Re: Detail Disassembly/assembly of NEF Pardner SB1 single shot??
« Reply #1 on: January 31, 2014, 11:42:47 AM »
I posted a reply right after your original post, but the server hard drive failed loosing about 8 month of posts. Anyway, you'll find everything you need in the FAQs sticky above.

Tim
"Always do right, this will gratify some and astonish the rest" -  Mark Twain

Offline Imaposer

  • Trade Count: (0)
  • Member
  • *
  • Posts: 7
Wow!  That was quick.  Thanks so much for the recommendation to check the FAQ.  Duh! Why didn't I think of that?   :-[   I've started browsing through the linked thread and, OMG!  Is there ever a wealth of information there!  Geesh!  Looks like I have some reading to do!  But, hopefully I'll find what I need there.  If not, then it probably doesn't exist.


Thanks again!

Offline Imaposer

  • Trade Count: (0)
  • Member
  • *
  • Posts: 7
Well, I hate to go back on what I've said, but maybe I AM a dumbass afterall!   :-[


I've been going through the FAQ since you first directed me there, and while there is a TON of great info contained therein, I have as of yet to locate anything that gives a concise layout of the disassembly/assembly procedures.  I'm probably blind.  And I did try the search function to no avail since none of the search terms that came to mind seemed to have any hits.  I did learn something new today though...  I thought I was fairly computer literate, but until tonight I wasn't aware of the control f function for searching internet pages.   :)


I'll keep looking of course, but is it perhaps contained within one of the many linked threads in the FAQ thread?  I've looked at quite a few that looked promising so far, but haven't yet found directions or tips on how to go about taking it down to the bare frame and barrel.


Don't mean to be a nuisance but if you could direct me just a little...  Like maybe just what subject would have this info contained within it.


Of course I'll keep looking, but I'm planning to strip this thing tonight so if I don't locate anything specific I'll just pull out the punches and start launching springs...   ;D


Oh well, thanks again for pointing me to all the info.  I'm sure some of it will come in handy at the very least. 

Offline quickdtoo

  • Global Moderator
  • Trade Count: (149)
  • Senior Member
  • *****
  • Posts: 43301
  • Gender: Male
Use the F3 page search as directed at the top of the FAQs page, keywords Trigger to find the trigger work info which covers R&R of the frame components, and ejector for the ejector work.

Tim
"Always do right, this will gratify some and astonish the rest" -  Mark Twain

Offline Imaposer

  • Trade Count: (0)
  • Member
  • *
  • Posts: 7
Ah HA!  Therein lies my folly!  While I did find the trigger job section earlier, and actually clicked on and read through one of them (among other things), I didn't click on the correct one.  I clicked on the one titled "Trigger Improvement by Perklo" just now though, and was redirected to another website.  Just a little looking there and I found the links to two downloadable files that detail doing a trigger job, including disassembly and reassembly of the frame and related components.


Just in case someone else stumbles upon this thread seeking this information (maybe the title will make it more clear and easier to "stumble" into  ;) ) the following link will take you straight to the page with the two part trigger job instructions:


http://perkloafm.com/downloads2.html


If you're too lazy to find it that way  ;) here's the direct links to the two pdf documents:


http://perkloafm.com/pdf/Handi_instr_one.pdf


http://perkloafm.com/pdf/Handi_instr_twob.pdf


This may prove to be very helpful!


Thanks again!


EDIT:  Oh, I forgot to include the instructions for disassembling the ejector mechanism from the barrel lug...


http://perkloafm.com/pixs/extractor_mod.pdf

Offline cwlongshot

  • GBO Supporter
  • Trade Count: (158)
  • Senior Member
  • *****
  • Posts: 9907
  • Gender: Male
  • Shooting, Hunting, the Outdoors & ATVs
Gun looks like a base for a project!!

Enjoy it!

CW
"Pay heed to the man who carries a single shot rifle, he likely knows how to use it."

NRA LIFE Member 
Remember... Four boxes keep us free: the soap box, the ballot box, the jury box, and the cartridge box.

Offline Imaposer

  • Trade Count: (0)
  • Member
  • *
  • Posts: 7
Gun looks like a base for a project!!

Enjoy it!

CW


Yep.  Got started on it today actually.  Got the wood stripped, dyed and one coat of BLO applied.  Also cut 2" from the stock since the LOP was a little long and I plan to install a Limbsaver grind-to-fit recoil pad that'll add 1" back.  Also made a slave pin for disassembly/assembly as per the instructions above and built my Park "tank" for the barrel.


I'll probably do a little project thread once done.

Offline cwlongshot

  • GBO Supporter
  • Trade Count: (158)
  • Senior Member
  • *****
  • Posts: 9907
  • Gender: Male
  • Shooting, Hunting, the Outdoors & ATVs
Gun looks like a base for a project!!

Enjoy it!

CW


Yep.  Got started on it today actually.  Got the wood stripped, dyed and one coat of BLO applied.  Also cut 2" from the stock since the LOP was a little long and I plan to install a Limbsaver grind-to-fit recoil pad that'll add 1" back.  Also made a slave pin for disassembly/assembly as per the instructions above and built my Park "tank" for the barrel.

I'll probably do a little project thread once done.

PLEASE DO!!!!!  LOVE the builds!!

I'm fixin to do another myself!!  This time a 20g shorty!! (I have two 12's. ::) )

I look forward to reading all about it! Oh, don't forget the pictures!!!

CW
"Pay heed to the man who carries a single shot rifle, he likely knows how to use it."

NRA LIFE Member 
Remember... Four boxes keep us free: the soap box, the ballot box, the jury box, and the cartridge box.

Offline stewmagoo

  • Trade Count: (17)
  • Contributor
  • ***
  • Posts: 342
  • Gender: Male
By nature humans are tinkerers. I realize that it is a practice tool for future projects. But I will warn you, your practice will become a desire with the NEF/H&R product. But instead of becoming a blinger tool make sure it's a bringer tool. Find out what loads are accurate first then remodel. There is some great YouTube  videos called the 80 dollar boom stick on its capability. Plus Clint Smith at Thunder Ranch uses the NEF in his defensive shotgun video. Keep us posted.


Sent from my iPhone using Tapatalk

Offline Imaposer

  • Trade Count: (0)
  • Member
  • *
  • Posts: 7
By nature humans are tinkerers. I realize that it is a practice tool for future projects. But I will warn you, your practice will become a desire with the NEF/H&R product. But instead of becoming a blinger tool make sure it's a bringer tool. Find out what loads are accurate first then remodel. There is some great YouTube  videos called the 80 dollar boom stick on its capability. Plus Clint Smith at Thunder Ranch uses the NEF in his defensive shotgun video. Keep us posted.


Sent from my iPhone using Tapatalk


Yeah, it's really just a project and and exercise in building a little "toy".  Like I said in my original post, I don't really have a "purpose" for it other than that.  I read the thread on arfcom that I linked to above and thought it looked like a neat little gun.  I'm not really a hunter but even if I was I'm not sure how the cylinder bore would pattern with small game loads.  I'm sure I'll play around with it some later just to see what it can and will do.  I suppose it would do ok with slugs for close range deer hunting though.  If turning it into a hunting gun I'd send it to Mike Orlean to have it threaded for choke tubes.  He's pretty reasonable and evidently does good work.  But, I really don't have much need since I haven't killed a squirrel in well over 20 years.


I have seen Clint Smith doing his thing with the SS and I know it'll do fine with my HD load of choice, Federal Low Recoil 00 buck with Flight Control wad.  But, in reality my HD bedside gun is my Mossberg 590A1 so I don't really need the NEF for that either.


The only "functional" purpose I could see for this is just as a cheap "truck gun", or maybe to keep loaded with some Brenneke slugs and in my tent when camping just in case I was to be invaded by a hungry black bear in the night.  ???


But, you're right.  After handling it a bit, I can see how these things could become addictive.  And in reality, since I'm not a hunter, one could make the argument that none of my guns serve a real "purpose".  Of course that doesn't keep me from enjoying them just the same. :)